
End of the Game
When there are no cards left in the deck, play continues, but players no longer dig for treasure at the start of their turn. Players continue taking other actions as usual on their turn, or they may pass and take no actions.
However, if all players pass in sequence, then the first player who passed must sell at least 1 of his cards to the museum when play returns to him.
When every player is left without cards in his hand (that is, all remaining treasures have been sold to the museum), then the game is over.
Each player calculates the total value of what he sold to the museum during the game. The selling value of each set of sold treasures is calculated separately. These values are then added together and the player with the highest total wins.
Note: unused Tent cards are not worth any points at the end of the game.
In the case of a tie, the tied players count the total number of cards that they sold to the museum. Whoever has the lowest total is the winner.
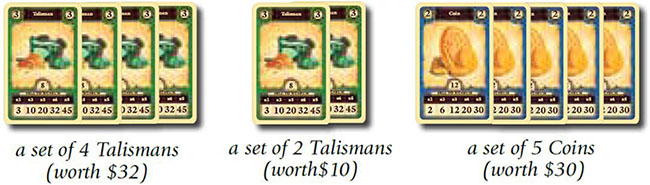
Example: At game end, Adele has sold 3 sets of treasures. Her total score is $72.
Variants
Long Expedition (for 2 or 3 players): For a longer game with 2 or 3 players, simply add the Broken Tablet and Broken Pendant cards to the game during setup. When using this variant, also add 1 extra Thief card to the game.
Fierce Weather: In this variant, all 6 Sandstorm cards are used in the game, regardless of the number of players. To counter these storms, Tents may be used twice during the game.
After a player uses their Tent card for the first time, it is flipped facedown. After using a Tent card for the second time, it is removed from the game.
Beginner’s Luck: This variant gives a small advantage to the player with the least valuable starting treasures.
Once the players have all received their starting hands, they add up the trading value of their 4 cards and announce the total.
Whoever has the lowest total takes the first turn of the game. If multiple players tie for the lowest, then whichever tied player last put their feet in the sand is the first player.
Continue Reading
Dig for Treasure
At the start of his turn, the player must dig for treasure by drawing the top card from the dig site.
If it’s a Treasure card…
The player has found that treasure! The card is added to his hand without being revealed to the other players. A player may have any number of cards in his hand during the game.
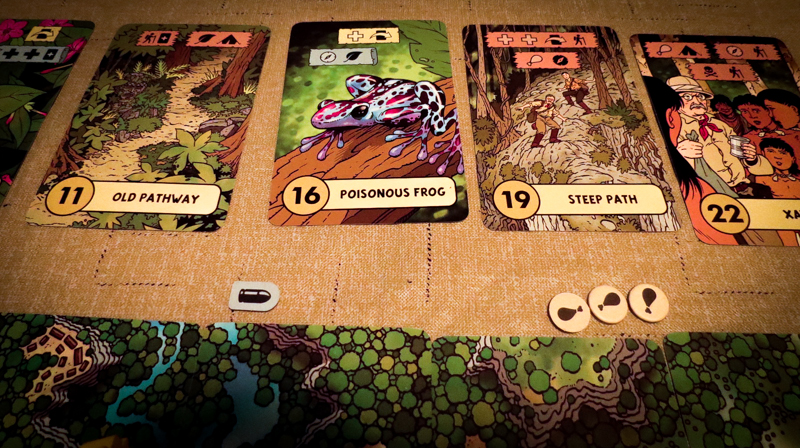
If it’s a Thief card…
The player has met a thief at the dig site and will use him to steal a treasure from another player.
After being drawn, the Thief card is discarded faceup on the table. This allows all players to track how many of the Thief cards are left to be drawn (this number varies according to the number of players, as shown on the card).

The player who drew the Thief must choose an opponent to steal from. He then takes one card from that player’s hand, without looking. This card is then added to his own hand without revealing it to the other players.
If no opponents have cards in their hands, then nothing can be stolen and the Thief card is simply discarded faceup on the table.
If it’s a Sandstorm card…
A sandstorm has struck all players, causing them to lose some of their treasures! These treasures are soon recovered from the desert by local merchants and will end up in the marketplace.
After being drawn, the Sandstorm card is discarded faceup on the table.
This allows all players to track how many of the Sandstorm cards are left to be drawn (this number varies according to the number of players, as shown on the card).
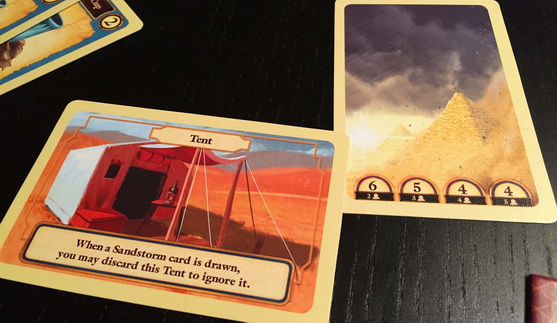
Playing your Tent Card
First, players decide if they would like to use their tent cards to take shelter.
Starting with the player to the left of whoever drew the Sandstorm, each player declares if they will be using their tent or not.
If a player decides to use his tent, it is discarded from the game and the Sandstorm will not affect him. If a player decides not to use his tent, or has previously used it, then the Sandstorm will affect him.
Example: Adele draws a Sandstorm. She discards it faceup on the table.
Ben is the player to her left and he decides not to use his tent. Christopher does the same. Daria chooses to use her tent and so discards it from the game. Adele has already used her tent previously.
Ben has 6 cards and so must discard 3 of his choice face-up to the marketplace. Christopher has 5 cards and so must discard 2. Daria does not discard anything as she used her tent. Adele has only 1 card in hand and therefore does not need to discard it.
Now the Sandstorm takes effect. Starting with the player to the left of whoever drew the Sandstorm, each player who did not use his tent must discard half of his cards (rounded down). Players choose which cards they lose. The lost cards now belong to the marketplace, and so are placed faceup in the middle of the table.
After the storm…
After the Sandstorm has taken effect, the player who drew the Sandstorm restarts his turn by again digging for treasure. In other words, after drawing a Sandstorm card, a player gets to draw again until he draws either a Treasure or Thief card.
Other Actions
After digging for treasure, the player may also trade at the marketplace, explore the monument, and sell treasures to the museum.
Except for the Explore action, the player may take these actions any number of times each turn and in any order, or choose to take none of these actions on his turn.
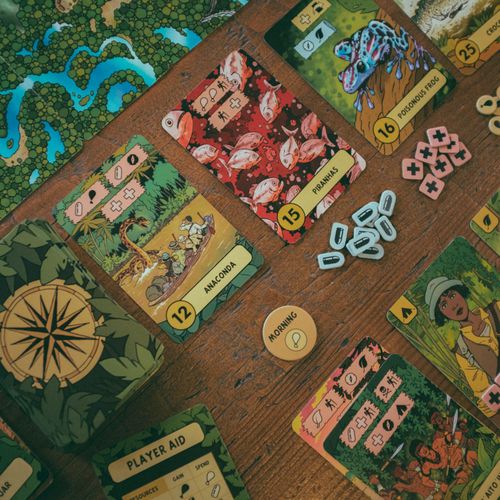
a. Trade at the marketplace
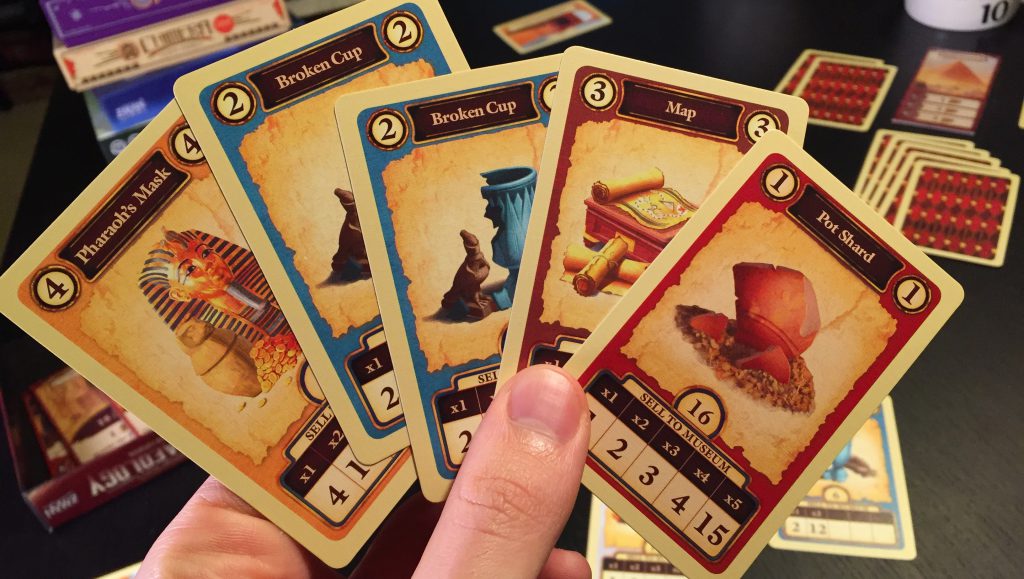
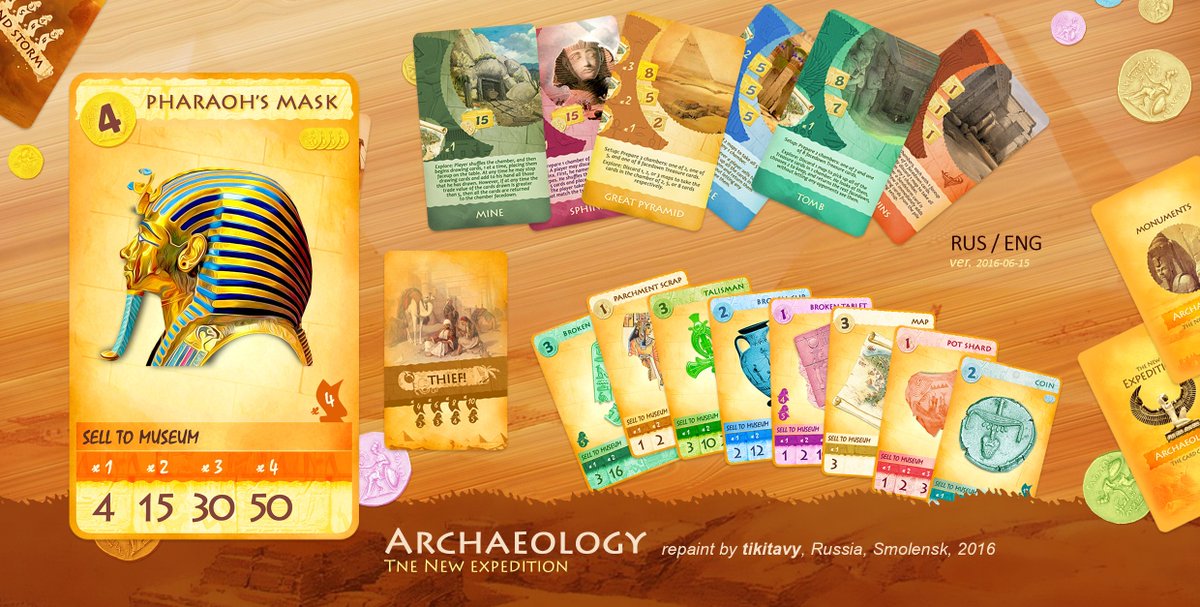
The player may trade any number of cards in his hand for any number of cards in the marketplace of equal or lesser trading value. A treasure’s trading value is listed in the top corners of its card.
Example: Adele decides to trade 2 Parchment Scraps (which have a trading value of 1 each) and 1 Coin (which has a trading value of 2) for 1 Talisman and 1 Pot Shard (which have a total trading value of 4).
Adele places her Coin and Parchment Scrap cards faceup in the marketplace and then takes the Talisman and Pot Shard from the marketplace into her hand.
If the cards chosen from the marketplace are of lesser trading value than those traded in, the difference is simply lost.
The player may trade with the marketplace multiple times in one turn. Any number of cards may be in the marketplace at one time. It is helpful to arrange the cards in the marketplace by type.


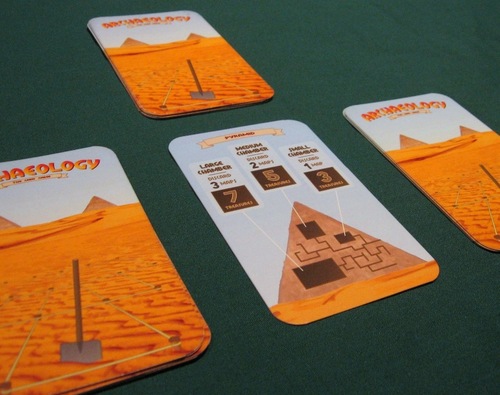
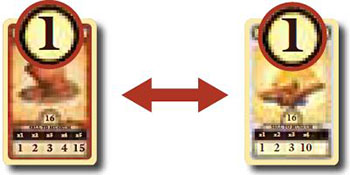
b. Explore a monument (only once per turn)
If the player has any Map cards, he may use them to explore the monument in order to gain further treasure.
According to each monument, the player may discard 1 or more Map cards from his hand to take a given number of Treasure cards from one of the monument’s chambers.
Example The Great Pyramid has 3 chambers. It costs a player:
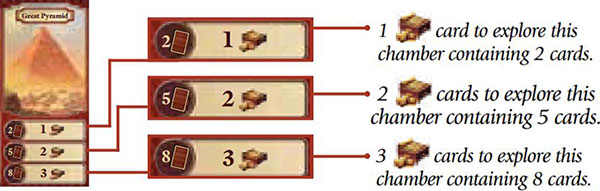
All cards taken from the monument are added to the player’s hand without being revealed to the other players. Discarded Map cards are removed from the game.
Most chambers may only be explored once in the game. Exceptions are described on the Monument tiles themselves and expanded upon on pages 10-11.
c. Sell to the Museum
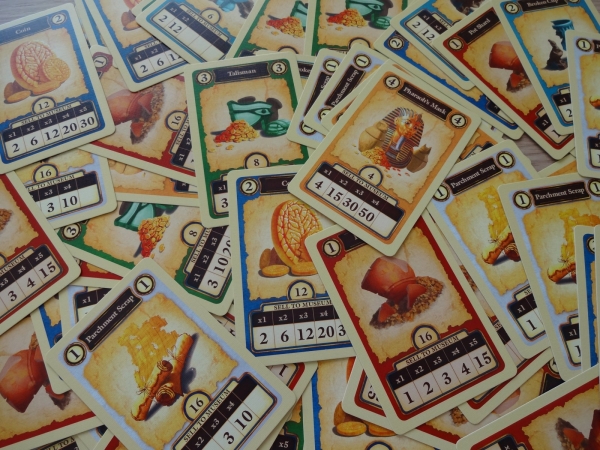
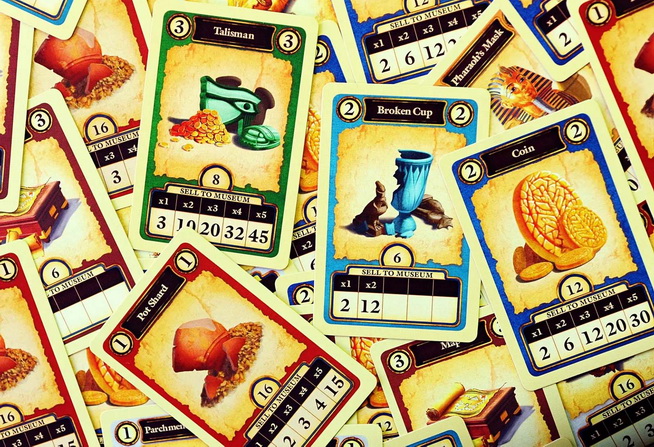
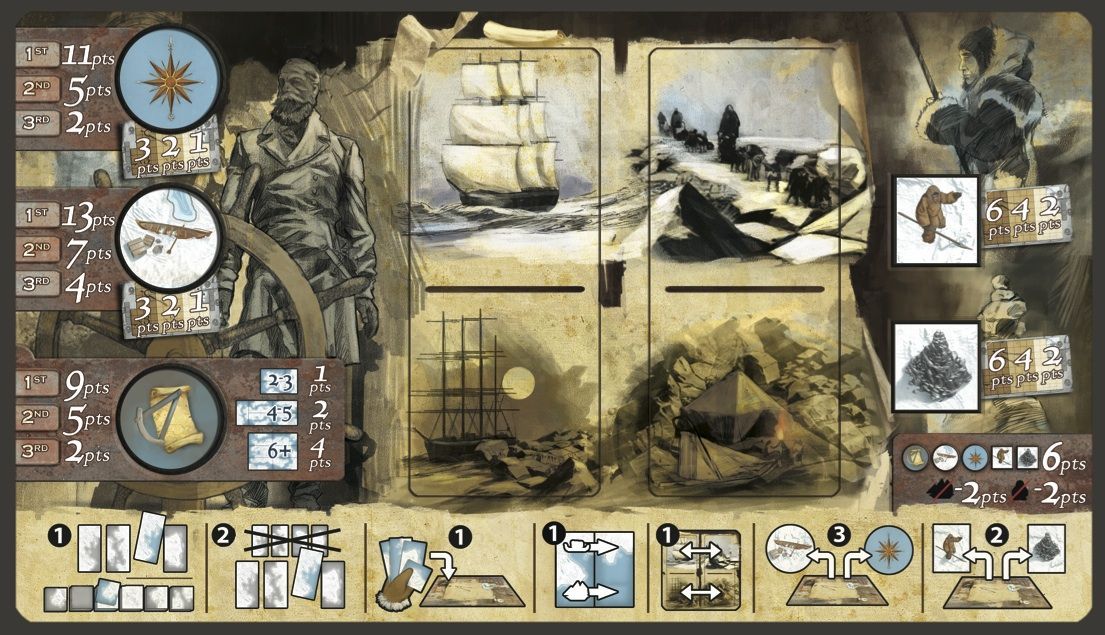
A player may choose to sell a set of 1 or more Treasure cards of the same type from his hand to the museum. These sets are worth money at the end of the game.
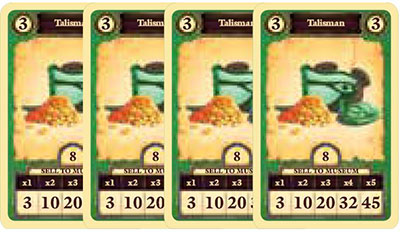
The value of a set of treasures is determined by the selling prices listed at the bottom of its card. For most treasures, you will notice that these values increase greatly with each card in the set.
However, Pot Shards, Parchment Scraps, Broken Cups/Tablets/Pendants must be fully assembled to make a good profit. That is, a complete set is needed for their value to substantially increase.
When a player decides to sell a set of treasures, he announces to the other players what he is selling. He then places the set of cards face-up on the table in front of him in an overlapping row, so that all the cards remain visible. Each time a set of treasures is sold it must be placed in a new pile. Cards cannot be added to a set of treasures that has already been sold.
A player cannot sell a set containing more treasures than the maximum number listed in its selling prices. For example, even if a player has 6 Talismans in his hand, he may only sell 5 of them as a set. The player may, however, sell multiple sets of the same type of treasure.
The player may sell to the museum multiple times in one turn. Sold treasures cannot be stolen by thieves or lost in sandstorms.
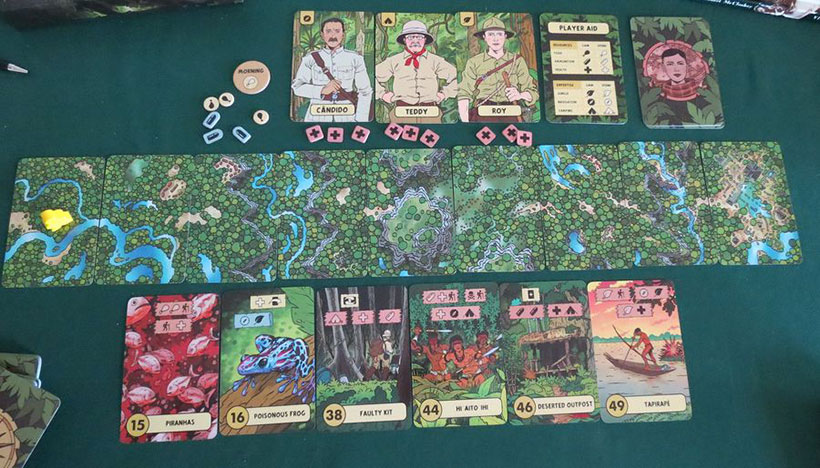
Setup
Set aside the Map, Thief, Sandstorm, and Tent cards.
When playing with 2 or 3 players, return the Broken Tablet and Broken Pendant cards to the box.
With 4 players, only return the Broken Pendant cards to the box.
Shuffle all the remaining cards into 1 deck.
Deal 4 cards from the deck facedown to each player. Each player takes these into his hand, keeping them hidden.
Each player also takes one Tent card which he places faceup in front of himself (the Tent card is not part of a player’s hand). Return the other Tent cards to the box.
-
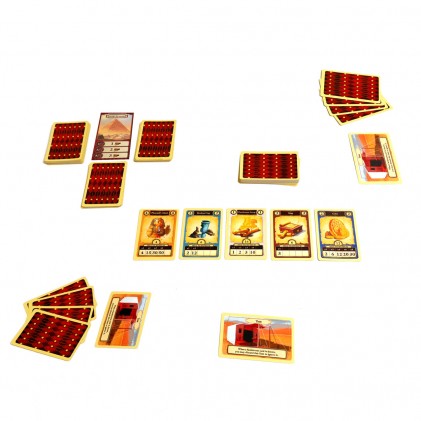
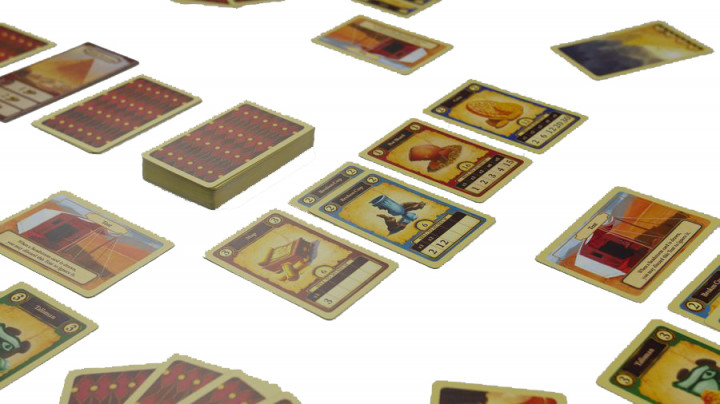
Deal 5 cards from the deck faceup to the middle of the table. Throughout the game, the faceup treasures in the middle of the table are called the marketplace.
Shuffle the 6 Monument tiles and reveal one. Return the others to the box.
Each monument requires a certain number of treasures to be placed nearby. Each brown circle represents a chamber. For each chamber, prepare a pile with as many Treasure cards as the number shows.
Note: For your first game, it is recommended to use the Great Pyramid. Some monuments have special setup rules, indicated on the tiles.
According to the number of players, use the correct number of Sandstorm and Thief cards (as shown at the bottom of the cards). Return the remaining cards to the box.
Shuffle the remaining Sandstorm, Thief, and Map cards into what remains of the Treasure deck. Place it facedown on the table. This deck is called the dig site.


The Monument Tiles
At the start of the game, you will randomly choose 1 Monument tile and place it on the table. During setup, prepare the chambers with Treasure cards as described below.
The cards a player may keep when exploring varies depending on the monument being used, as described on the tiles themselves and below.
Explore: Discard 1, 2, or 3 maps to take the cards in the chamber of 2, 5, or 8 cards respectively.
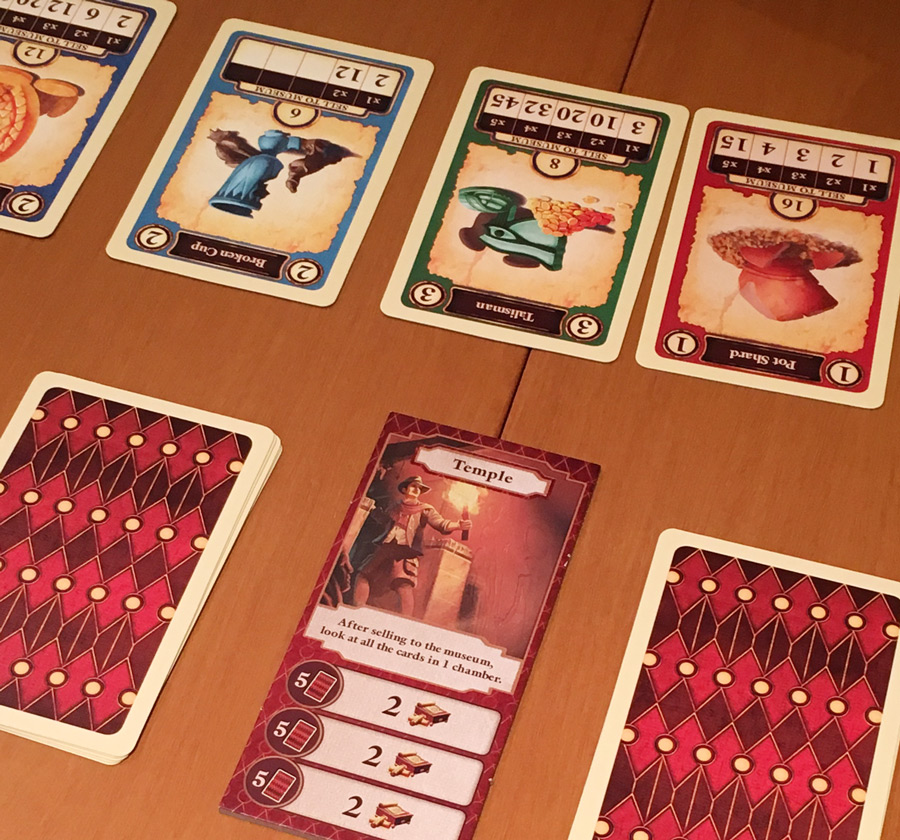
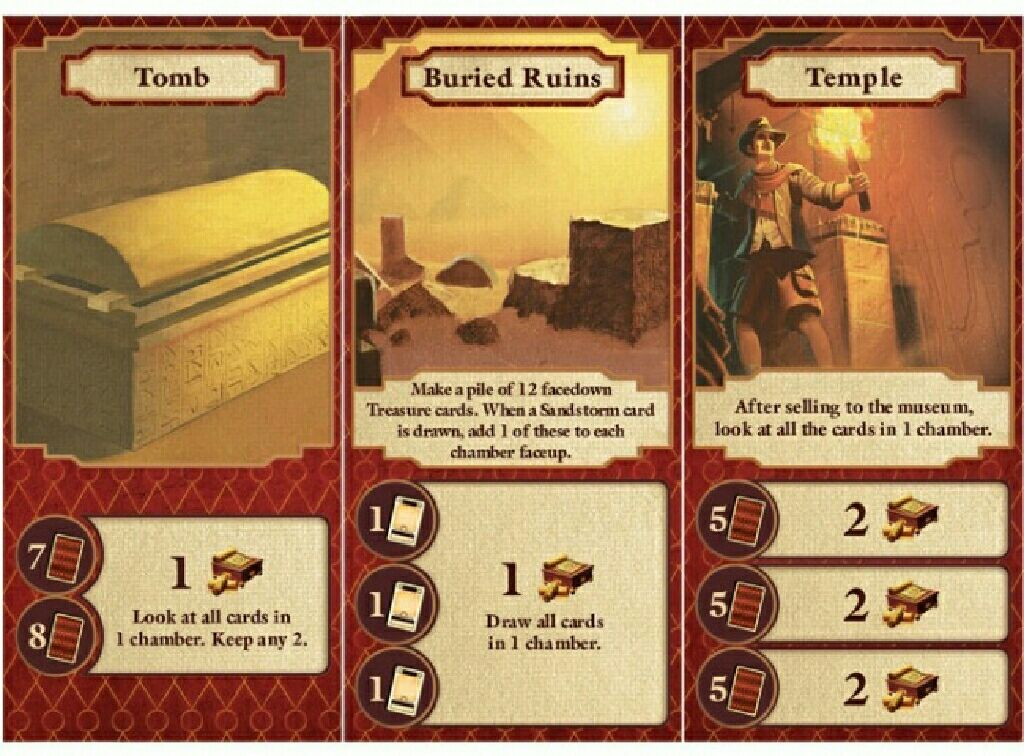
Temple
Setup: Prepare 3 chambers, each with 5 facedown Treasure cards. Explore: A player may discard 2 maps to take all 5 cards from any 1 chamber.
During play: Whenever a player sells to the museum, he may pick up all the cards in any 1 chamber, look at them and return them facedown, without letting any opponents see them.
Tomb
Setup: Prepare 2 chambers: one of 7 and one of 8 facedown Treasure cards.
Explore:.A .player may discard 1 map to pick up all of the Treasure cards in 1 chamber. He looks at them, chooses 2 to keep, and returns the rest facedown, without letting any opponents seed them.
In this way, the number of cards in each chamber will decrease as the game goes on. Once a player chooses a chamber, he must discard the map and take 2 cards from it.
If there is only 1 card left in a chamber, then this is all the player receives. Players may check how many cards remain in each chamber at any time.
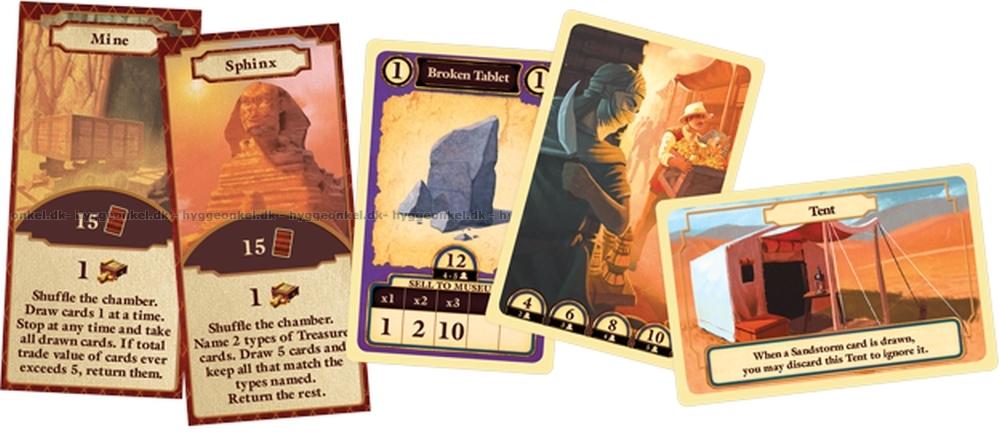
Mine
Setup: Prepare 1 chamber of 15 facedown Treasure cards.
Explore: A player may discard 1 map to explore the Mine. He shuffles the chamber, and then begins drawing cards, 1 at a time, placing them faceup on the table.
At any time, he may stop drawing cards and add to his hand all those that he has drawn.
However, if at any time the trade value of the cards drawn is greater than 5, then all the cards are returned to the chamber facedown, and the player receives nothing. Players may check how many cards remain in each chamber at any time.
-
Sphinx
Setup: Prepare 1 chamber of 15 facedown Treasure cards.
Explore: A player may discard 1 map to explore the Sphinx. First, he names 2 different Treasure card types that he would like to find. He shuffles the chamber, and then draws 5 cards and places them faceup on the table.
If there are fewer than 5 cards, the player draws all that remains. The player takes all the Treasure cards that match the types that he named. Any cards not taken are returned to the chamber.
In this way the player may receive 0-5 cards depending on how good his guesses are. Players may check how many cards remain in the chamber at any time.
Buried Ruins
Setup: Prepare 3 chambers, each with 1 faceup Treasure card. Also, deal a pile of 12 facedown Treasure cards beside the Buried Ruins tile.
Explore: A player may discard 1 map to take all the cards from any 1 chamber.
During Play: Whenever a Sandstorm card is drawn, the player who drew it immediately adds 1 card to each chamber, using cards from the pile prepared during setup.
These cards are placed faceup in the chambers so that all cards in the chambers are visible to all players. Then, play continues as normal regarding the effects of the sandstorm, including the decision to use a Tent or not.
In this way, more treasures are revealed as sandstorms occur. This means that as Explore actions are taken, the number of treasures in each chamber may differ. Once the prepared pile of Treasure cards runs out, no more treasures are added to the chambers when sandstorms happen.

Экспедиция The Lazarus Instrumentality
Рекомендованный уровень: 60.
Рекомендуемое количество игроков в группе: 3.
Где находится: локация Reekwater.
Требования для входа: один из членов группы должен иметь ключ Lazarus Tuning Orb, также вам потребуется посох Azoth (его можно получить при прохождении сюжетных квестов на 20-ом уровне).
Lazarus Tuning Orb можно создать из следующих материалов (нужно прокачать Stonecutting до 150-го уровня и найти станок Stonecutting Table 5 тира):
- Corrupted Lodestone – появляется в сундуках, которые дают за закрытие групповых разломов (можно скрафтить из 2-х единиц Corrupted Crystall на станке Stonecutting Table 5 тира при прокачанной профессии Stonecutting до 100-го уровня).
- Asmodeum Chisel – можно купить у фракционного NPC на 5-ем фракционном ранге (стоит 7000 фракционной валюты и 750 золота).
- Runestone – крафтится из реагента Obsidian Sandpaper, Putrid Lodestone и Obsidian Voidstone (качаем профессию Stonecutting до 200-го уровня).
- Putrid Lodestone – редкий вид руды Blightcrag.
- Lazarus Core – особый реагент, который можно скрафтить на станке Stonecutting Table 3 тира из Undying Heart, Elemental Heart, Glowing Spore (ищите в элитных сундуках в Siren’s Strand в локации Reekwater) и Earth Totem (ищите в элитных сундуках в Malevolence в локации Edengrove).
Undying Heart крафтится из:
- Death Quintessence – можно сделать на станке Arcane Repository 5 тира (качаем Arcane 125 уровня) из Death Essence (крафтится из Death Wisp, для которой нужны Death Mote). Суммарно для крафта потребуется профессия Arcane 125 уровня.
- Life Quintessence – можно сделать на станке Arcane Repository 5 тира (качаем Arcane 125 уровня) из Life Essence, которая в свою очередь создается из Life Wisp, для которой нужны Life Mote.
- Soul Quintessence – можно сделать на станке Arcane Repository 5 тира (качаем Arcane 125 уровня) из Soul Essence, которая в свою очередь создается из Soul Wisp, для которой нужны Soul Mote.Blight Seeds – можно выбить из боссов подземелья Garden of Genesis.
Что можно получить:
- Одноручный топор, посох жизни, лук, ледяная перчатка рыжего грейда 6 тира (с определенным шансом).
- Кольцо рыжего грейда 5 тира на Dexterity (с определенным шансом).
- Оружие Lazarus Watcher или материалы для его создания (рандомные бонусы к характеристикам).
- Легкую броню Guardian Flanker (бонус +12 к Intelligence и +8 к Focus).
- Среднюю броню Guardian Spearmarchal (бонусы +12 к Strength и +8 к Dexterity).
- Тяжелую броню Guardian Plate (бонус +20 к Constitution).
Прохождение квеста The Expedition Into Saircor (Экспедиция в Сайркор)
Этот квест не займет у игроков много времени, поскольку он один из самых простых, к тому же игрокам не придется далеко путешествовать, чтобы выполнить задания, поставленные магистратом Gladis Bond (Глэдисом Бондом). Только будьте готовы к тому, что придется немного повоевать с врагами 20-го уровня, прежде чем отправиться на поиски.

Отправляйтесь к мосту Saircor (Сайркор), чтобы найти записку первой экспедиции
Первый этап этого квеста — отправиться на северо-восток от поселения First Light (Первого света), пока не достигнете огромного каменного моста. Это сооружение — мост Saircor (Сайркор), и именно здесь можно найти первую экспедиционную записку, необходимую для выполнения этого квеста. Игрокам нужно внимательно осмотреть местность, так как экспедиционная записка с надписью «A Prophet of Profit (Пророк наживы)» будет спрятана за несколькими большими каменными кирпичами.
После прочтения записки квест будет обновлен: теперь нужно войти в Saircor (Сайркор) должным образом, чтобы продолжить работу потерянной экспедиции.
Найдите записку экспедиции в Saircor (Сайркоре)
Войдя в Saircor (Сайркор) после пересечения моста, игроки заметят, что в него ведет один главный путь. Следуйте по маркеру через руины, пока не придете к открытой квадратной площадке с короткой лестницей, ведущей к ней. Рядом с правой стороной лестницы будет лежать следующая записка экспедиции, озаглавленная «Misguided Anthropology (Заблуждения антропологии)».
После прочтения этой записки в журнале появится последняя цель этого квеста. Теперь игроки должны разыскать Tutelary Regent (Регента Тутеляров) в Saircor (Сайркор) и победить его, чтобы получить Древнюю глиняную статуэтку.
Победите Tutelary Regent в Saircor
К счастью, Tutelary Regent (Регент Тутеляров) будет находиться не очень далеко от того места, где вы нашли записку второй экспедиции. Отправляйтесь на юго-запад и поднимитесь на внешнюю сторону того, что кажется древним храмом, чтобы встретиться с Tutelary Regent (Регентом Тутеляров), который будет ждать вас на вершине лестницы.
Их будут поддерживать скелеты-миньоны, поэтому не теряйте бдительности и будьте готовы расправиться с относительно слабыми лакеями. Помимо попыток завалить игрока своими подчиненными, чтобы занять их, Tutelary Regent (Регент Тутеляров) будет постоянно отступать и пытаться метать копья при каждой возможности. Не забывайте сражаться с умом и блокировать входящие атаки дальнего боя в перерывах между ударами по скелетным приспешникам, так как Tutelary Regent (Регент Тутеляров) могут нанести серьезный урон, если им дать возможность зарядить свои копья.
Однако после победы над Tutelary Regent (Регентом Тутеляров) выпадет желанная статуэтка из древней глины, а также некоторые другие товары, и цель квеста будет обновлена. Теперь остается только вернуться в поселение First Light (Первого света) возле Dayspring (Дейспринга) и поговорить с Gladis Bond (Глэдис Бонд), чтобы сдать квест.
Завершение квеста и получение награды
Путешествие обратно в поселение First Light (Первого света) позволит сдать квест, поговорив с Gladis Bond (Глэдис Бонд). Узнав, что случилось с пропавшей экспедицией, Gladis Bond (Глэдис Бонд) наградит игрока отличной добычей.
Награды за завершение квеста
- 1.200 опыта;
- 87,50 Gold (золота);
- 20 Azoth (азота).
Даже после завершения этого квеста обязательно продолжайте общаться с Gladis Bond (Глэдис Бонд), так как у нее будет еще много возможностей для игрока. Вот все квесты, которые вы можете получить у этого магистрата в поселении First Light (Первого света) (включая этот):
- Settling In (Обустройство);
- Trader’s Market (Рынок торговца);
- Constable’s Orders (Приказы констебля);
- New Alliances (Новые союзы);
- Unsolved Mysteries (Нераскрытые тайны);
- Nyhart’s Anchorage (Якорная стоянка Найхарта);
- The Expedition into Saircor (Экспедиция в Сайркор);
- Bond’s Gambit (Гамбит Бонда).